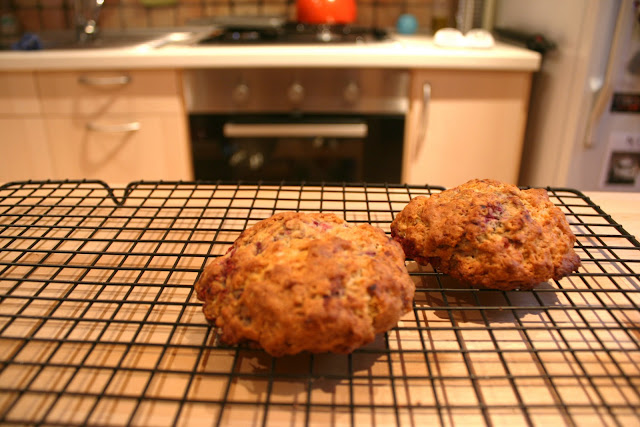
The cooler weather has certainly put me in the fall baking mood. And since I'm (gasp!) not a huge fan of pumpkin and I'm still waiting anxiously for cranberries to show up in my grocery store, I have to get creative in order to get in my baking fix. These scones may not exactly be categorized under "fall flavors," but they're still delicious. While making them a smidgen healthier, the addition of oatmeal also gives them a lovely, almost chewy texture without taking away from the lightness of the scone. If anything, they can be classified as slightly heartier, perfect for those chilly mornings.
As always, there is the option of freezing the unbaked scones for future use. Scones don't really keep longer than a day and are at their best fresh out of the oven. So if you won't be eating the whole batch, go ahead and freeze them, then wrap individually in plastic wrap. Bake straight from the freezer, adding on a few minutes to the baking time.
Oatmeal Raspberry Scones
1 large egg
1/2 cup cold buttermilk
1 2/3 cup all-purpose flour
1 1/3 cup old-fashioned oats
1/3 cup sugar
1 tablespoon baking powder
1/2 teaspoon baking soda
1/2 teaspoon salt
Pinch of nutmeg
10 tablespoons cold unsalted butter, cut into small pieces
3/4 cup fresh or frozen raspberries
Preheat the oven to 400 degrees. Line a baking sheet with parchment paper or a silicone baking mat.
Combine the egg and buttermilk. Stir together; set aside.
Whisk together the flour, oats, sugar, baking powder, baking soda, salt, and nutmeg in a large mixing bowl. Cut the butter into the flour mixture (use a pastry blender, fork, or your hands) until the mixture is crumbly. Pour the egg and buttermilk mixture into the dry ingredients and stir just until incorporated (the mixture will be sticky). Very gently, fold in the berries just until incorporated. Gently knead the dough 6-8 times, just until it comes together into a sticky dough. Portion the dough out into 8-12 scones, depending on the size you prefer, and transfer to the prepared baking sheet.
Bake for 20 minutes or until golden brown. Transfer to a cooling rack and let cool for at least 10 minutes before serving.
Source: Annie's Eats
Thursday, October 20, 2011
Wednesday, October 19, 2011
A Taste of Fall
Fall has finally arrived here! We had several weeks of warm, pleasant weather, and then overnight the flip was switched and suddenly it's downright chilly. The last few days I don't think the house has gotten above approximately 62 degrees and I spent the majority of my time wearing five layers and hanging out on the couch under blankets. Thankfully the heat has kicked in now and today I was able to extract myself from my cocoon and make this soup.
I had planned on trying out this recipe for Butternut Squash Soup today anyways, but the weather turned out to be raining in addition to just being cold, perfect for a comforting bowl of soup. There's nothing like a bubbling pot of soup on the stove to make the house feel more cozy. Especially one that's so simple and delicious!
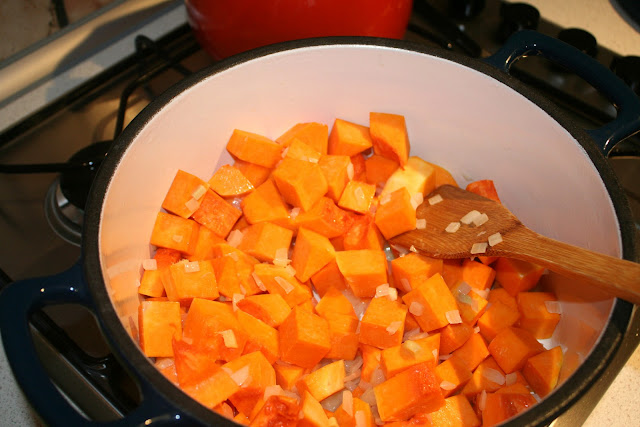
The only prep work required is chopping up the squash, onion, garlic, and some fresh ginger.
Melt some butter in a big pot and cook up the onions for a couple minutes.
Add the garlic, ginger, and squash and cook some more.
Pour in some water and let it simmer until the squash is tender.
Then puree it all up in the blender and voila! Yummy squash soup.
Perfect for a cozy evening at home listening to the rain.
Butternut Squash Soup
2 tablespoons butter
1 small onion, chopped
1 piece (2 inches) peeled fresh ginger, chopped
2 garlic cloves, chopped
2 3/4 pounds butternut squash, peeled, seeds removed, cut into cubes
1/4 cup fresh orange juice
Melt the butter in a large saucepan over medium heat. Cook the onion until fragrant, about 2 minutes. Add the ginger, garlic, and squash. Cook, stirring occasionally, until fragrant, about 6-8 minutes. Stir in 4 cups water. Bring to a boil, reduce heat and simmer until squash is tender, about 20 minutes.
Puree the soup in two batches. Stir in the orange juice and 1 1/2 teaspoons salt. Serve hot. If desired, garnish with sour cream.
Source: Great Food Fast
Thursday, October 6, 2011
the completed kitchen (and banana bread)
As promised, here are a few shots of our new island in its correct place. So far, I'm absolutely loving the extra work space, and the storage underneath is awesome as well. It's the perfect place to keep my trusty Kitchen Aid mixer handy and ready to use. We also got some hooks for the metal bars on the side so we can hang things. Right now I have a couple of our smaller pots and pans that I use almost every day hanging on the hooks, mostly because it's so convenient to just grab them instead of digging through the cupboard.
And here's a shot of the entire kitchen, clutter, garbage can, and all.
To take the new island on its maiden voyage, I decided to whip up some banana bread. I found a recipe awhile ago that I've been wanting to try, and since I had some bananas that were looking rather unappetizing it seemed like the logical choice. The recipe I used is from the May 2011 issue of the Food Network Mag. I absolutely love this magazine and it is hands down my favorite cooking/food-related magazine. I probably get at least half of the recipes I try from it.
Anyways, this recipe has been in the back of my mind for a few months, probably because it has the option of adding chocolate chips. What's not to love?
It came out pretty good! It was very moist, almost too moist, but once it cooled all the way it stayed together well enough. The chocolate chips made it richer than the average banana bread, but I'm not complaining. If you're interested, the recipe can be found here. It's definitely a keeper!
Wednesday, October 5, 2011
kitchen island
We have a new addition to our kitchen! The island/butcher block is up and ready to go. I'm proud to say I did the majority of the work myself, although I did try to enlist Donovan to tighten a few stubborn screws. He handed me the power drill. No joke.
Anyways, it wasn't all that difficult to put together. Just lots of pieces that had to go together in a certain order.
An action shot of me tightening some bolts...
And the finished upside-down product! Sorry for the glaringly bright licence plate in the background. I really need to find a better place for that.
I had to wait until Donovan came home from work before I could flip it right-side-up, since it's solid wood and bad things probably would have happened if I tried to do it myself. And then we got sidetracked with the weekend and everything, so I didn't take any pictures of the island actually in place. So tomorrow I'll put up some pictures of it right-side-up, sanded, and oiled. And even trying it out by making some banana bread!
Tuesday, October 4, 2011
Milano
Well, Donovan is once again up in Germany for training, which means I finally have the time to sit down and write some blog posts. This is his last training rotation until after Christmas, so hopefully once he gets back things will slow down, he won't be working super long days, and we'll actually see each other more than just weekends.
For one last shebang before he left, we took a day trip to Milan on Saturday. It's about two and half hours each way, so a long day but still doable. Let me just say, Milan is a crazy city. Driving in downtown was an experience, and not really a pleasant one, but thankfully we (and the car) made it out unscathed. The biggest draw of Milan was the Duomo, which took over five centuries to complete and is actually the fourth largest cathedral in the world. It is very impressive to look at it, and I could have easily spent the entire day there. As it was, we walked around the exterior and did a quick loop of the inside, although we did sit for a while inside to try to take in the sheer massiveness of the building.
Of course, being in Milan, we had to do some shopping as well. Or at least walk around and look at all the stores; most of the stuff was way too expensive for us. Everything was still fun to look at though and we had a blast!
Subscribe to:
Comments (Atom)


